Oceanhorn 2 Full Walkthrough Part 7 - Thunderstones, getting the Diving Helmet, entering Ootheca, and more

With this we've finished off The Great Lagoon in Oceanhorn 2: Knights of the Lost Realm
Oceanhorn 2: Knights of the Lost Realm takes a lot of cues from The Legend of Zelda: Skyward Sword. I've only just realised this. Yes, we all knew this was a Zelda-like, but the comparisons to Skyward Sword are growing each day.
We are onto part 7 of our Oceanhorn 2 walkthrough, and once you're through with this guide you will have seen everything you need to of The Great Lagoon.
Finally, it's time to work our way inside Ootheca, and to do that we've got to destroy the rest of the Thunderstones, only that's far more difficult than we expected. We'll be infiltrating two palaces, acquiring a diving helmet, swimming the entirety of the lagoon, and finally getting inside the place we meant to see in the beginning.
All of that and more in this guide, and if you need the solutions to anything else in the game, see our previous and future guides!

- Part 1 - Pirate Hideout, Galactoss, Arne Beacon, and more
- Part 2 - Saving Trin, Arne Invasion, Hoverbike, and Sernoa Station
- Part 3 - Sernoa Station, White City, L'Istrait, Deep Jungle, and more
- Part 4 - Owru Chief, Deep Jungle treasure, Owru Shrine, Beacon Hill Dungeon
- Part 5 - All Power Spheres, Prita Beacon Underground, Firebird Boss Solutions
- Part 6 - Submeria, The Great Lagoon, Thunderstones, and more
Palace of Insight - Thunderstone II part 2

- Head up the stairs and around, and you'll find a lightning marker on the floor, turn around from here to find a similar electric node puzzle to others we've completed, and the floor will raise
- The next room is a literal maze - head down the stairs to the right, and make Trin hit the Switch near the entrance
- Hit the next switch and instead of immediately heading through the path made by the nearby moving blocks, instead stand on top of the blocks and make Trin hit the Switch again, then move through the small opening to the left - this will lead to the top, and to the key you need in the main room - you can exit the maze easily with the grapple hook
- Once you unlock the next room you'll need to connect electric nodes again, but this time they're behind two brick walls on either sides of the room - use bombs to blow them away
- Once they're all linked, from right to left, another elevator will activate in the main room
- Once up you'll be confronted by another Thunderstone - this one gives out a lot more drones, but other than that it's exactly the same deal as before, though unfortunately Trin was far less helpful in this encounter for me…
- Once the Thunderstone is done, head back outside, but not before looting the chests on the top floor
Searching the Sunken Wreck and getting the Diving Helmet

- Once back outside head left and follow the beach to find a Sunken Wreck
- You'll be able to climb onto the sunken wreck from the right side, where vines have grown near a rock
- Dive into the water and head onto the ship proper and get to the chest in the centre to earn a diving helmet - you will now be able to swim without drowning and dive underwater when it is equipped
- You can go diving for a lot of treasures in the Great Lagoon now that you can swim infinitely, and it also means travelling will be a lot easier…
- Just get swimming and head straight for that yellow marker
- Once you arrive at the yellow marker you'll have to dive under the water to find the entrance to the Palace of Courage
Palace of Courage

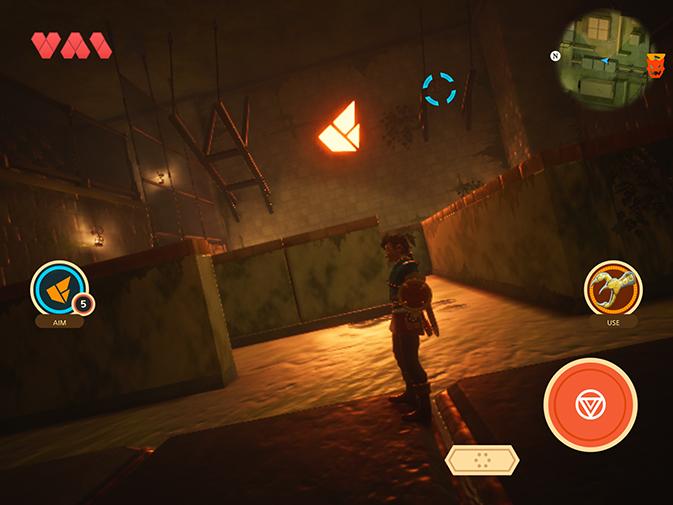
- Once inside surface and climb onto the platform - everything here is a bit sideways, though still similar to the previous palace
- Climb upwards using vines on the wall, hit a switch to open a gate, then go through
- Once inside you'll find another maze - let's do this…
- Go inside and clear out enemies, you'll find a couple of blocks to use to climb a raised area
- Once on top, use your fire shot to shoot out some platforms attached to the opposing wall
- One will open up the path, and the other will reveal a grapple point - grapple to it and hit the switch below - this will lower the blocks blocking the way forward, but not for long, be fast
- Get on top of the lowered blocks, and wait for them to raise again to continue
- You'll get the key to the elevator control room - head to the main chamber and to the opposite gate to open it up
Steelscale - Magister Militum

- A wee miniboss for a change - this is a high-level Gillfolk soldier, and a few weak shooters
- You can use your gun or your grapple to reach and finish off the Gillfolk which are shooting, just beware of falling - also, if you take too long, they will respawn…
- Steelscale is a pretty standard fighter, just with a lot of health - keep rolling so he can't jab you with his trident, and take as many hits as possible
- There are four pots in the room you can break for health, two near each door, and the respawn quickly, so you can run back and forth to heal if necessary
- Once all his health is done, he's over, and that's it, you can use the key to open the door and flip the lever to activate the elevator in the main room
Chamber of Intrepidity - Thunderstone III

- This Thunderstone is much like the previous two we've taken care of, but once again, with many more drones to send attacks your way
- This time you're solo, so you can't expect Trin to help you out, and since there will be so many attacks coming your way, shooting your way out will be far more difficult
- Instead of shooting, you should use the stage to your advantage. The room is sloped - head to the bottom of the room and the drones will lower, then you can run at them and attack rapidly
- Keep it up and you'll eventually win, just make sure to watch your health and stamina as the fight progresses - those attacks add up fast…
Getting inside Ootheca

- Now that all of the Thunderstones are down it's time to finally get inside that dungeon - and yes, it has taken long enough
- Head to the yellow marker on your map, it'll be a golden dome with a water path in the centre - dive on in and follow the underwater lights to find a path to Ootheca
- Once inside, well, you're inside! Now to find a way to let in Gen and Trin…
