Ragnarok Twilight beginner's guide - 5 tips to maximise idling in Midgard
Idle RPGs are effortless enough, but our Ragnarok Twilight beginner's guide should help make your adventuring even more fuss-free.

The Ragnarok franchise has gone through its fair share of versions over the years, which is, to me, a testament to how awesome the OG Ragnarok Online was back in the day. But while we've seen everything from Survivors-likes to card battlers, I feel like there's always going to be a place for idle RPGs thanks to mobile's pick-up-and-play nature - which is why Ragnarok Twilight has taken that genre and splashed it with a Poring-themed coat of paint.
To be honest, the system will pretty much hold your hand all throughout your journey here - even as you hit Level 200 and beyond, the never-ending tutorial will still ask you to tap on certain elements from time to time as you unlock shiny new things. With that in mind, I've decided to lay out my Ragnarok Twilight beginner's guide a tad differently - instead of telling you what you should do as you embark on your journey, I'll offer a handful of tips that the overly eager tutorial might not have shown you (or might have skipped entirely).
Ragnarok Twilight beginner's guide
It goes without saying that every time you see a red dot hovering over a certain icon (or, in this case, a red Poring-shaped dot), this means there's something there to check out, so you'd best do so ASAP before you get overwhelmed by all the action items you need to accomplish. It does, admittedly, feel like your main goal is to clear out all the red dots at times, because they're just that many.And that's precisely why I'm here to help shed light on some of the stuff that might not have red dots on them. So, strap on your novice backpack, hop onto your bouncy Poring mount, and let's get to it.
Tip #1: Mind your AFK settings
As you step out into the big world of Midgard, wide-eyed and eager to explore the vast lands around you, the first thing you might notice is that some guy named Apprentice Thief seems to be tagging along with you. This is part of the aforementioned hand-holding I was talking about earlier, as you won't have to go at it alone - not when the RPG seems to think you need a companion adventurer to make your questing more manageable. Even with that, it's easy to party up here; MVPs have 100% drop rates, and you'll basically keep auto-advancing from city to city until you decide to log out.
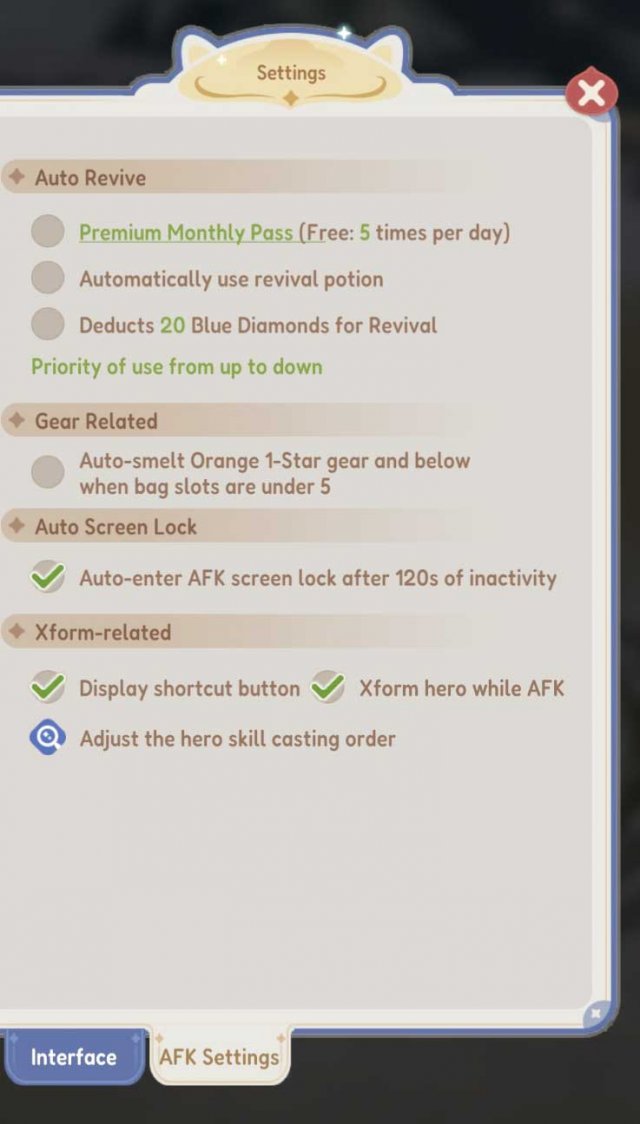
And even when you do, your AFK rewards will keep things ticking over for you, so make sure you set those offline rewards properly to maximise your rewards. The tutorial doesn't exactly show you how to make adjustments for offline play, so make sure that as soon as you're able, tap your profile icon and hit Settings. There, you'll need to navigate to the AFK Settings tab to toggle everything as necessary.
Tip #2: Prioritise Promotion first
You'll eventually get overwhelmed by the sheer number of things you'll need to tap on to progress, but for me, I say prioritise the Promotion tab in the lower left corner of your screen. There are a variety of achievements you can clear, and since this is where you can progress from T1 to T2 and so on, this will help you really feel like you're advancing in your chosen class. It's where you'll change from Novice to your first Job, after all, so it's the best progression to take on in my opinion (not to mention you get loads of Blue Diamond currencies for your trouble).Tip #3: Unearth the secret codes
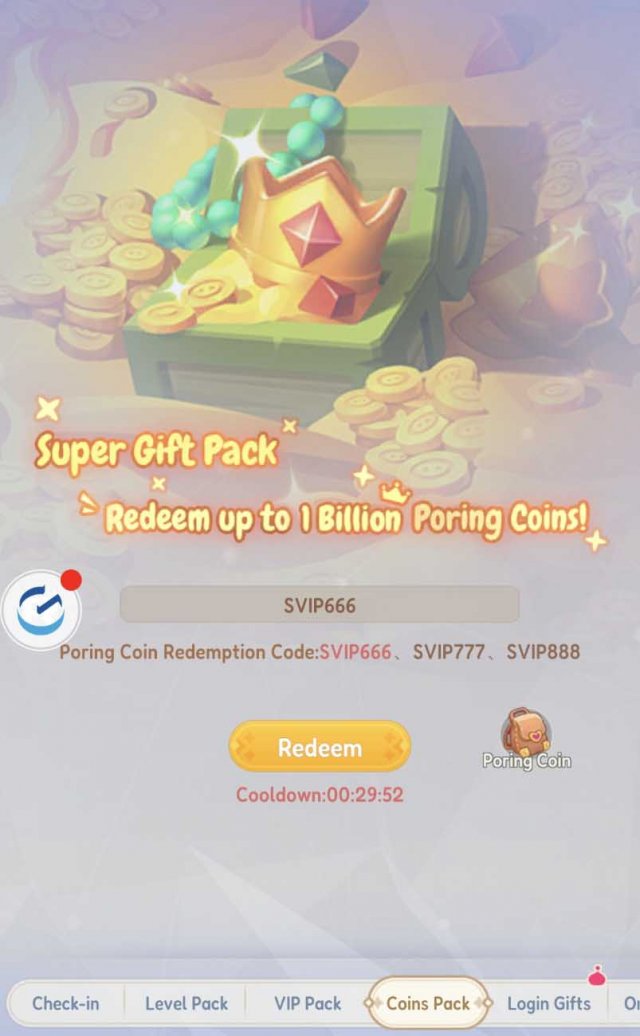
I stumbled upon a tab for redeeming secret codes as I was aimlessly getting lost within the layers and layers of tabs in the menu. I say they're secret because, again, the tutorial doesn't really tell you about them, but when you click your profile icon and head on over to the Redeem icon, you can navigate to the Coins Pack tab and find that you can "redeem up to 1 Billion Poring Coins!" as a super gift pack. Poring Coins can be used to redeem items in the Shop, which refreshes every 7 days and includes Gems to upgrade your gear. You can even get Pink Diamonds (the paid currency) if you're really lucky!
Tip #4: Grab as many Gems as you can
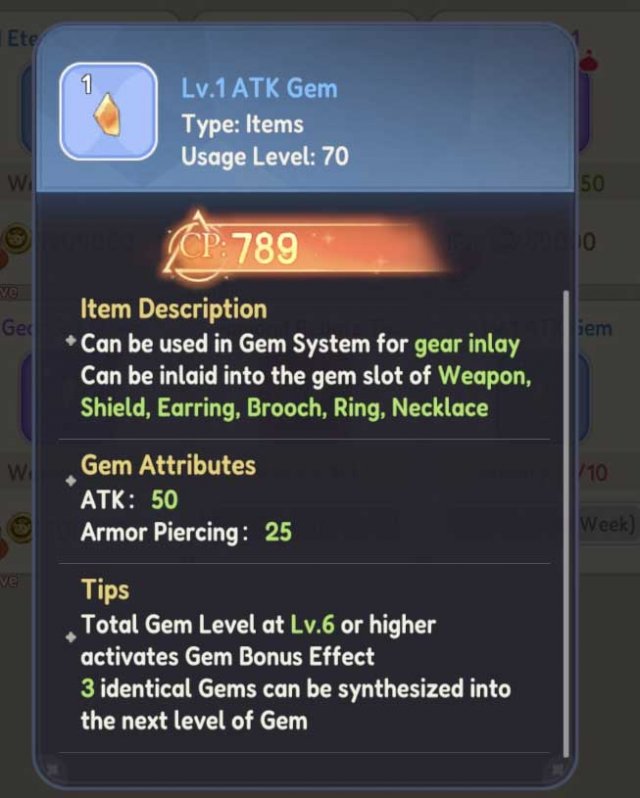
And speaking of Gems, you can use different kinds for different gear upgrades, which I feel are even more important than Cards and Runes, to be honest. When you go into your Forge tab, navigate to the Gem icon where you'll see how you can inlay gems onto your equipment. And these do give you really, really useful buffs, as, for instance, the Eternal Life Gem can add to your HP and DEF while the ATK Gem can add to your ATK and Armor Piercing stat - and I can't stress it enough just how important any stat boost can be, which brings me to my next point…
Tip #5: Don't forget to donate
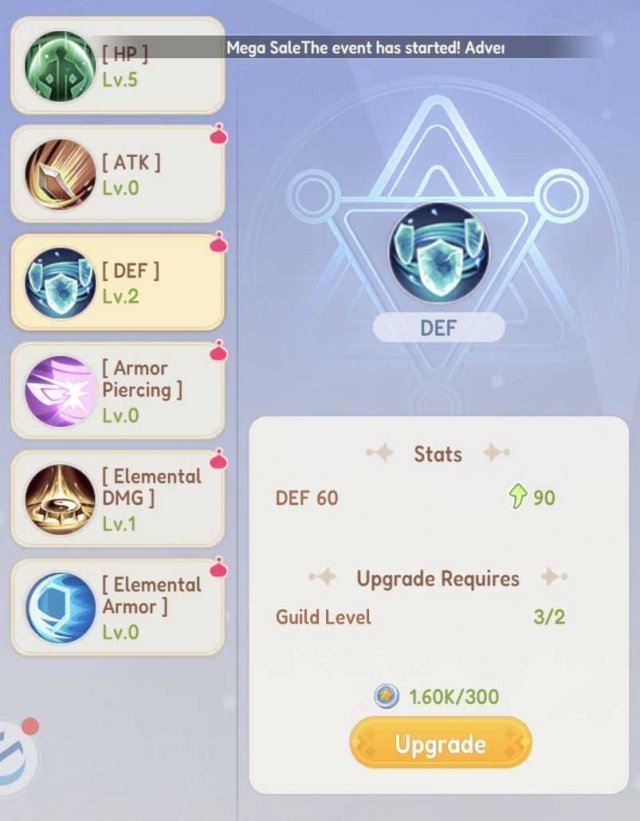
Now, I know donations are normally supposed to be altruistic and all, but for the sake of this Ragnarok Twilight beginner's guide, let's just say it can't hurt to have a little bit of an ulterior motive when you're donating to your guild out of the goodness of your heart. The tutorial doesn't highlight this, as I had to figure this out on my own, but as soon as you join a Guild, you should learn to donate.
Go to your Social icon on the lower right part of your screen (the two heads with the mail icon), then navigate to the Guild tab. Go to the Cultivation tab next, where you'll see a bunch of permabuffs you can allocate your Guild Contribution to, aptly described as "star coins symbolising selfless dedication to the guild". Even better is that these permanent bonuses are NOT affected when you do decide to leave or switch Guilds - but you wouldn't do that thanks to your "selfless dedication", would you?
And with that, I hope my little Ragnarok Twilight beginner's guide helps make your idle adventuring a lot more productive. Don't forget to claim these Ragnarok Twilight codes too for even more free stuff!