How to get started with Nokia's N-Gage application
30 steps to mobile gaming nirvana

So, Nokia's N-Gage has finally gone live. Actual N-Gage, not the beta First Access application that N81 owners have been playing in recent weeks.
As we reported last week, the full N-Gage application is now available for the N81, N81 8GB, N95, N95 8GB, and N82 handsets.
So, we fired up our trusty N81 8GB with the screenshot app we downloaded the other day, and set to work with a 30-step guide showing you how N-Gage works. It assumes you've installed it, which is explained on Nokia's download site.
Step-by-step with the all-new N-Gage application
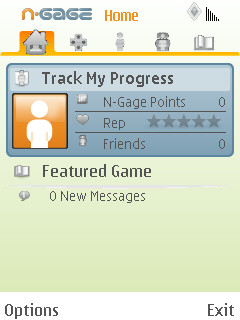
| Step 1: Home screen Congratulations! You've installed the N-Gage application onto your phone, and fired it up. This is the home screen for N-Gage, which shows at a glance your progress stats, messages, and a featured game of the week. Accessing the different features is handled by moving left and right, to tab between the icons at the top of the screen. |
 |
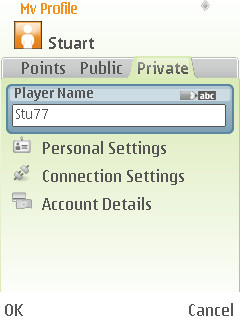
| Step 2: Check your profile screen Click on the Track My Progress bit on the homescreen, and you'll be taken to your profile. Here, you can enter your desired player name, and tweak your settings. Starting with… |
 |
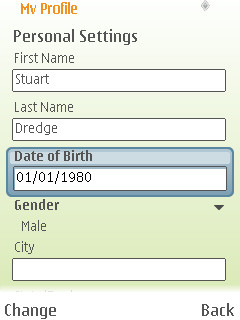
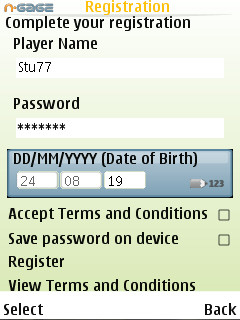
| Step 3: Personal settings Type in your name, date of birth, gender, city / country, and so on. It's all self-explanatory (and sorry identity-stealers, that date of birth in the screenshot is the default one, not mine). |
 |
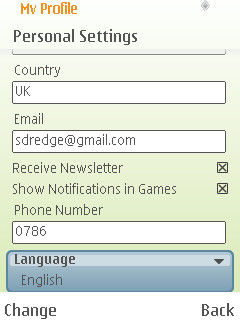
| Step 4: Edit the settings You're also asked to enter your email address and phone number, while also setting whether you wish to receive the N-Gage newsletter, and receive notifications in games. In truth, we don't know what that latter one means, but if we find out, we'll update this step. |
 |
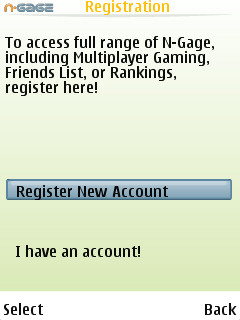
| Step 5: Register on Arena Yes, I know, this is a bit strange, but effectively you have to register your details twice: once as part of your profile; and then again to register for N-Gage Arena. With the cut-off between First Access and actual N-Gage, it's best to register a new account, if we're honest. At least, that's what we did, and happily nobody had nabbed our username. |
 |
| Step 6: Enter more details Getting a bit impatient yet? We certainly were, but it's good to pay attention – little touches like saving your password on your device make a big difference when you're actually using N-Gage. |
 |
| Step 7: Enter your email Hurrah, we're in! Oh, apart from submitting our email address, which isn't a mandatory step, but will come in pretty handy if you ever forget your password. |
 |
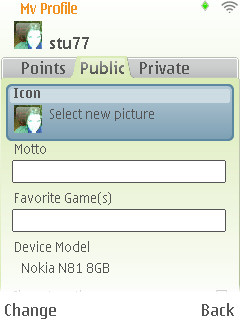
| Step 8: Upload a photo You're back in the application in the My Profile section. Tell your fellow N-Gage gamers something about yourself, by clicking on the Icon bar, and choosing a photo from your phone's memory to represent you. You can also type in a motto, and enter your favourite games. All of this info will be public. |
 |
| Step 9: The My Profile screen Just so it's clear, the My Profile screen is where you control your data within N-Gage Arena, including that public info above, but also your private settings. We've dealt with Personal Settings in steps 3 and 4, so now it's time to tweak your Connection Settings. |
 |
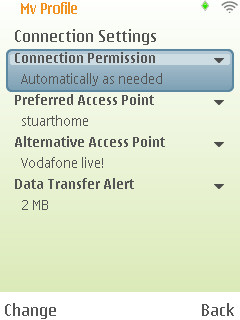
| Step 10: Connection Settings This is where you define how you want to connect to N-Gage Arena – whether it's automatic when you fire up the N-Gage application, or whether it asks you every time. You can also set your preferred access point, and an alternative. My preferred AP is my home wi-fi network, while my alternative is Vodafone. If I go beyond 2MB, I'll get a warning. Handy. |
 |
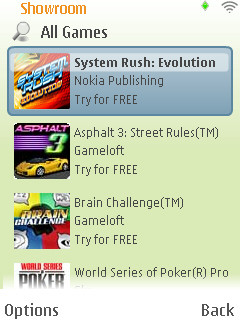
| Step 11: Go to Showroom It's the rightmost icon at the top of the screen, and it's where you buy N-Gage games. There's a different Game of the Week every week (clever, huh?), as well as the option to browse all available games, or Game Extras. We're not sure what they are yet, so let's click on Available games. |
 |
| Step 12: Browse the games All the available games are presented to you and at launch they were all available as free trials, with the idea being that you only pay for them once you've downloaded the trial version (which is actually the full version, with a lock on it). Anyway, click on the one you're interested in. |
 |
| Step 13: Check the details Each game has its own screen with some brief details about the number of players, what multiplayer mode it has (online or Bluetooth), and what N-Gage Arena features it has, as well as the button to download the free trial version. |
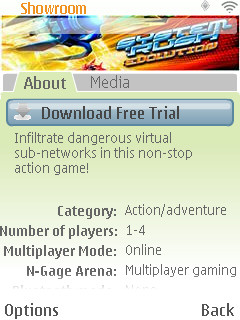 |
| Step 14: Check the media Before you download a game, click right to access the Media tab. This is where you'll find screenshots and even gameplay videos, to help you decide if a game is worth downloading. |
 |
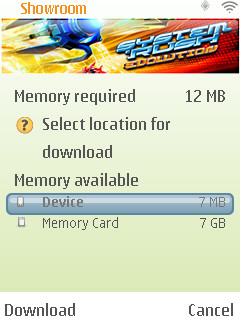
| Step 15: Choose a download location When you go back to the About tab and click on the download button, you'll be asked where you want to install the game – the memory requirements are given to help. On our N81, we're installing everything on the Memory Card because… well, you can see the numbers. |
 |
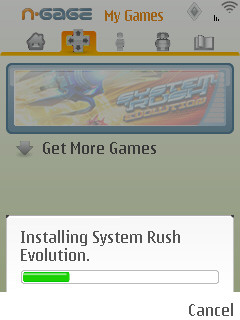
| Step 16: Download the game The demo will then begin to download – bear in mind it's the whole game, just with most of it locked off – so if you buy it, you won't need to re-download. This is where wi-fi comes in really handy, especially for the super-large Nokia games. Needless to say, if you're not on a flat-rate data tariff, DON'T do this over the mobile network. |
 |
| Step 17: Check it's arrived When a game has been downloaded to your phone, it'll show up on your My Games screen. However, it's greyed out, which means it's not been installed yet. This happens automatically, but it's worth knowing about – we've seen some posts on the N-Gage forums from people wondering why their games don't work, and it's because they weren't installed. |
 |
| Step 18: Install it! Happily, this is automatic – you're asked if you want to install it, select Yes, and bingo. Just remember not to press cancel during the process. |
 |
| Step 19: Browse your games Here's a screenshot of our My Games screen after we downloaded the launch titles. Notice that they're not greyed out any more, but also the difference between trials (those with a pink 'TRIAL' badge) and full games. The meters on the right of the full games fill up as you progress through them and earn Point Pickups, which we'll explain in a bit. |
 |
| Step 20: Try or buy From the My Games screen, click on a game to launch it. If it's a trial, you'll be offered the chance to buy it now, or enter its activation code if you already bought it before (for example, if you've just changed handsets from one N-Gage phone to another). Or you can just play the demo, of course. |
 |
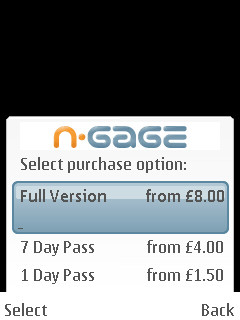
| Step 21: Choose a purchase option One of the good things about N-Gage is you have multiple purchase options. So, you can pay the full price to keep the game, or buy a seven- or one-day pass for a cheaper price, to see if you like it. The prices are shown clearly – most games are selling for £8, although a few are £6. |
 |
| Step 22: Choose your billing method You can pay for games in two ways: through your phone bill – in which case a premium SMS will be sent covering the cost – or by entering a credit card. You'll be able to save your credit card details to save time on future purchases. |
 |
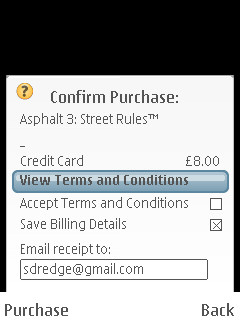
| Step 23: Confirm your purchase You'll be asked to confirm your purchase after entering your card details (if necessary). Remember to click the Accept Terms and Conditions box, and if you want a receipt, enter your email address. We use the receipts to store our Activation codes, so it's well worth using that option. Now, time to play! |
 |
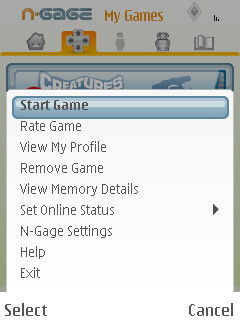
| Step 24: Using the left soft-key Now it's time to show some of the options of the N-Gage application. Many are triggered by pressing the left soft-key under your screen. For example, when in the My Games screen, pressing the left soft-key brings up this menu, from which you can start the game, but also rate it, check its memory details, and set your online status. |
 |
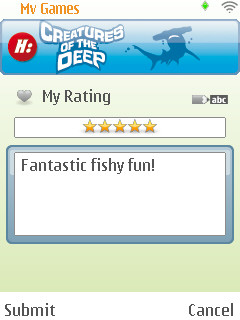
| Step 25: Rate a game The ratings system for N-Gage is pretty simple – you just give your rating from one to five stars, and a comment. When you press Submit, it'll be uploaded to N-Gage Arena, helping to give fellow gamers an idea of which games are good (and which are less so). |
 |
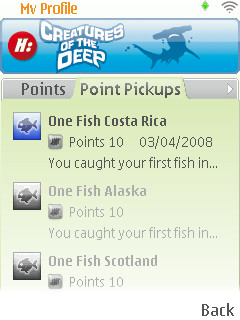
| Step 26: Point Pickups It's worth explaning Point Pickups at this point. From your My Profile screen, scroll down to a game and click to access the Points screen. From here, you can see your Point Pickups – achievements within the game which win you N-Gage Points. You can check which you've got, and which you still need to get. Oh, and the Points tab lets you see how your friends are doing, too. |
 |
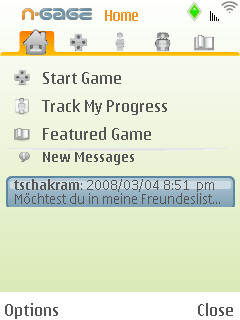
| Step 27: Check your messages Now head back to your Home screen – the left-most icon in the N-Gage app. If you have any new messages, they'll be shown at the bottom. These include friend requests, which you can respond to by clicking on them. |
 |
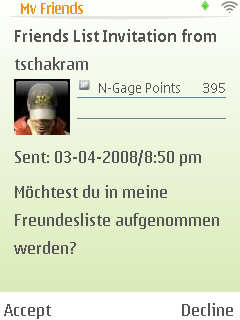
| Step 28: Accept friend list invites If someone's invited you to be their friend, you'll see the full message when you click through, with an option to Accept or Decline. Oh, and you'll see their N-Gage points total too, to judge whether they're too ninja/newbie for your refined gaming tastes. |
 |
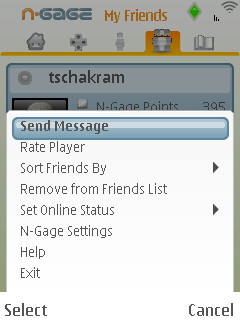
| Step 29: Say hello Once you've added someone as a friend, you'll see them in your My Friends screen (the fourth icon along). Pressing the left soft-key here brings up another menu, where you can rate them out of five, change how your friends are sorted, and if you've fallen out, you can remove them from your friends list. Oh, and you can send them a message, too. |
 |
| Step 30: Play with friends Also, once someone is on your friends list, you'll see if they're online at the same time as you, on your Home screen. It doesn't appear that you can launch directly into a game from here, but you can at least see that they're online, ping them a message, and then meet them within a game that allows multiplayer. |
 |

Stuart Dredge
Stuart is a freelance journalist and blogger who's been getting paid to write stuff since 1998. In that time, he's focused on topics ranging from Sega's Dreamcast console to robots. That's what you call versatility. (Or a short attention span.)