How to solve The Room 2 - Chapter 2 walkthrough and puzzle guide for The Ship (Part 1)
Spoiler alert!
Found yourself stuck in Fireproof's sumptuous box fiddler The Room 2? Good job you found this guide, then. Here, we will walk you through every step you need to take if you want to finish the chapter at hand.
In chapter two, we are taken out to sea, with a handful of puzzles to solve in the belly of a pirate ship. We'll be cracking open a treasure chest; decorating a model ship; and playing with weights and scales.
This chapter is so long that we split the guide for it into two pages. Check out part 2 here.
Follow our movements, and you'll solve every puzzle and make your way to the next chapter. But remember to only use this guide as a last resort - it's much more satisfying to figure things out by yourself.
More The Room 2 guides
Chapter 1
Chapter 2
Chapter 3
Chapter 4
Chapters 5 and 6
 Look at the tiny pirate ship and double-tap on the crow's nest of the mast at the front of the ship.
Spin around both the top and bottom segments of the nest so the picture of some rope appears (and the lines on the crow's nest and the rope images all line up).
It will open, revealing a key. Take it.

Zoom out and look at the cannons on the deck of the tiny ship. Move them so they are both facing the starboard side of the ship and are up against the side of the boat.
A keyhole will appear. Unlock it with your key and then pull back the side of the ship to reveal a hidden section.
Take the strangely shaped key. Move the left ruby into the centre of the track and another area, to your left, will appear. Go there.

Look at the right side of the treasure chest and pull the handle up to reveal a secret compartment. Take the strange cylinder from inside.
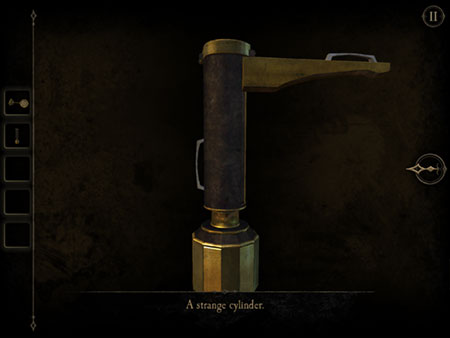
Look at the cylinder in your inventory. Pull up both arms to turn it into a key.

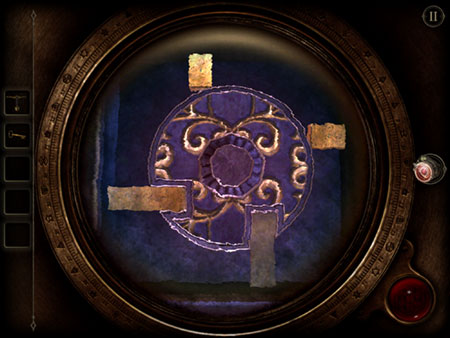
Look at the front of the chest. Pry open the two covers to reveal this crazy lock. It needs three triangle-based symbols.

The first, for the bottom symbol, is on the key we took earlier.
The second, for the top-right symbol, is on the bottom-left-hand corner of the left side of the treasure chest.
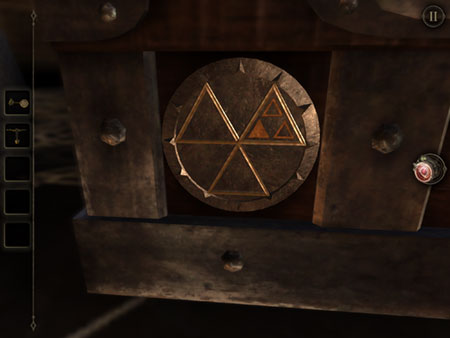
The third, for the top-left symbol, is on the wooden post near the treasure chest. Spin the two ornate wheels around to reveal a gap, and a small door will open. Take the key and then remember the symbol.
Go back to the front of the treasure chest and spin the three wheels to insert the right codes. It should look like the image above.
Then, insert your strange key and turn it to unlock the chest. Pull back the lid to open it.

We need to open four locks to remove the four plates on this layer of the treasure chest. We've marked the three areas you need to look at first on the image above.

One: On the first area, use your eyeglass to see a secret lock. Spin this shape anticlockwise to make the two pins retract. This will open the first lock.
Two: On the second area, flick the yellow switch to reveal another window. Use your eyeglass to see the secret lock. Pull the two pins out from the shape, then spin it around so that the other pins fall into the hole.
Three: Next, go to the shape on the back of the lid. Use your eyepiece to see the lock. Twist both curved doors to make the pins fall into the semi-circles.
When you've opened these three locks, a button will appear in the bottom-right plate. Pull it down to reveal another window just to the right. Tap on it.

Wear your eyepiece. Move both triangular pieces back towards to the edges of this area so the pins are pushed back to into the treasure chest. This is the final lock. A strange shape will appear at the centre of the chest.
Place the cylinder that we found earlier into this strange shape. Then, twist it clockwise to unlock the next layer. Grab a hold of this layer and pull it back to reveal the next section.

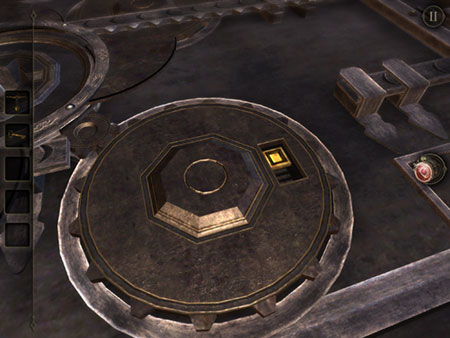
In this section, we need to draw a path for the ship to take based on the instructions given on the paper on the right. It reads, "North for 2 miles, West for 2 miles, South for 3 miles".
As such, press the grid tiles seen in the screenshot above and then tap on the ship button beneath the letter to go on a little journey.

A picture of a keyhole will appear beneath the letter.
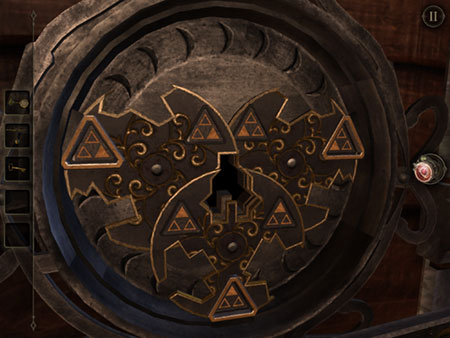
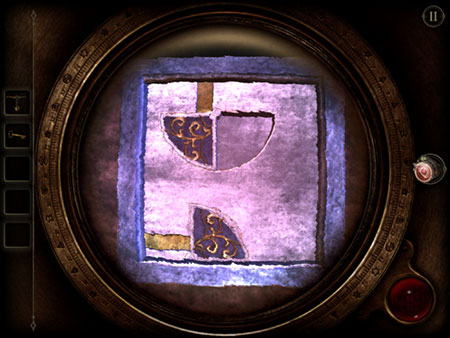
Spin all the triangles on the right as far as they'll go so it looks like the screenshot above.
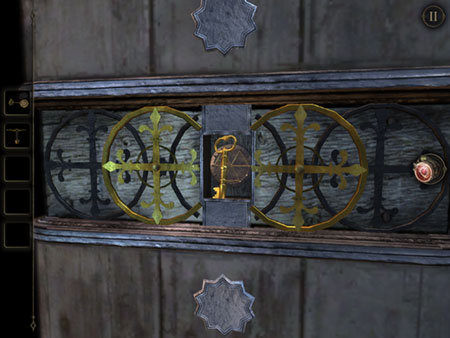
Then, spin the bottom two triangles down so it looks like the image above. Now, move the triangle with the circle gap up and then the triangle with the rectangular gap up to make a keyhole.
Put your key from earlier in the hole and twist.

A new letter and a new map will appear. The letter reds, "4 miles West, 4 miles North, 2 miles West".
Copy that on the map, just like the screenshot above. Then, hit the ship symbol.
A new letter will appear. This time, use your eyepiece to see a ship's wheel. Spin it right and you'll eventually turn around and see a floating red compass. Align it with the compass on your mast and the fog will disappear from the map.

The letter reads, "6 miles South, 2 miles East, and 1 mile North".
As before, copy this onto the map like the image above. The ship will hit a button, revealing a hidden compartment. Inside is a painted figurehead. Take it and return to the toy ship.

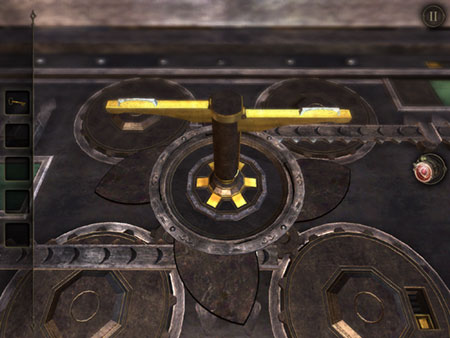
Look at the front of the ship and put your new figurehead on the bow. A compartment will open, containing a tiny wheel. Look at the rear deck of the tiny ship and place the wheel on the pedestal.

Turn it a few degrees clockwise and a compartment will appear at the bottom of the ship. Flick the switch to make the sails appear and make another wheel appear on the deck of the ship.

Turn the wheel clockwise until a flap opens at the bottom of the ship. It needs four letters. We can find them by looking at the sail and using the eyepiece.

See? It reads, "ROSE". Input those four letters into the combination lock beneath the ship to reveal a red gem. Take it and look into the rear end of the ship where you moved the other red gem.

