Beyond a Steel Sky Walkthrough 4 - Graham's messages, finding inspiration, Aspiration Gala, controlling Joey and more

This walkthrough will take you through some of the trickiest parts of Beyond a Steel Sky
Beyond a Steel Sky is a true successor to the classic PC adventure game Beneath a Steel Sky, by which I mean it can be a bit difficult if you're not thinking like an adventure game developer.
There are twists and turns, unexpected uses of items, odd characters to interact with, and a bunch of jokes in the mix. But we're here to help you with those brain-teasing puzzles so you can move through the story of Beyond a Steel Sky without too much stress.

In this, the fourth part of this walkthrough, we're covering Graham's messages, Tarquin's inspiration, getting into the Aspiration Gala, getting into the Control Room, finding Orana and an old friend, seeing Ember from the beginning of the game, and even finding Milo, at long last.
Just take a look below for all of that and more, and just in case, here are our other Beyond a Steel Sky guides…
Previous walkthroughs The next walkthrough
1
Graham's messages
- With the MINOS hacking over with, we can finally peer into Graham Grundy's messages, so let's head back to his apartment - you can throw the Bilby toy into the furnace before you leave, on Leet's behest
- Get into Graham's bedroom and access the MINOS terminal to peek at his messages
- Go through Graham's messages, read all you want, and find the message with the attachment
- Once you've found it, select the new mystery icon in the Holoplinth section of the terminal
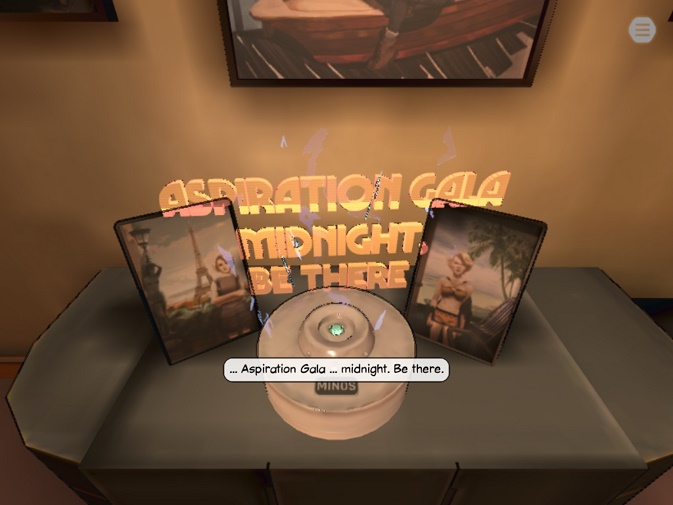
- Now the holoplinth in the main room will change, but be indecipherable - use the broken holoplinth gem in your inventory
- Now we have a new message, and a new goal, to get into the Aspiration Gala at midnight
- You can talk to Songbird and Chipworth to ask about the Aspiration Gala, but only one droid will help you, and he's very poetic
- Reginald's Dapper Butler Tarquin will be waiting just outside the building, and he needs inspiration: exhaust his dialogue, and you'll be tasked with finding inspiration for him from Reginald
- Head to the Piazza to find Reginald and steal some inspiration
2
Getting inspiration poetry from the cafe
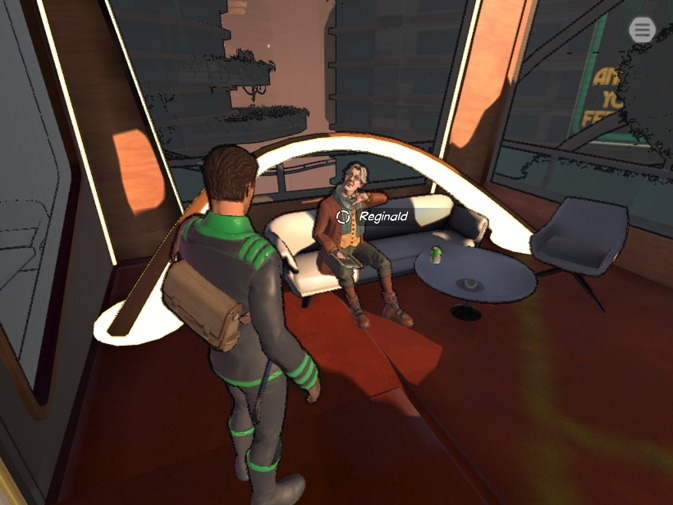
- You'll find Reginald in the VIP area of the cafe - getting in is a simple case of opening up your hacker and allowing yourself access, but getting his poetry is more difficult
- Exhaust Reginald's dialogue and you'll find him to be secretive, and up his own arse: he deserves to have his poetry stolen, honestly
- To the left of the cafe you'll find a diagnostician, you can talk to her, but all you need to do is transfer her music to the cafe's music system via your hacker
- Since you've swapped around the programs on the VIP door, Reginald won't be able to leave
- Transfer the alarm from the Spankles terminal with the door system to trigger it when Reginald tries to leave
- When you get confronted by the security droid, blame Reginald
- Now get close to Reginald and wait for the speaker robot to approach, then use your hacker and transfer Reginald's Aspiration Day Poem to the droid
- Make sure to deactivate the alarm by setting Reginald free
- Follow the speaker droid with the poem to the brooch stall, and transfer the poem to the stall
- Once transferred, you'll can change your brooch hologram, doesn't matter what you'll pick, and you'll get the poem on your brooch
- Finally, go back to Tarquin at the apartments and give him the brooch by using the "inspiration" option
- Once all is done you'll be given a ticket to the gala, and you can put on a set of party clothes in your bedroom, and Songbird will join you once you arrive at the monopod
3
Getting inside the control room at the Aspiration Gala
- Once your arrive at the gala you'll spot some shadowy types in the rafters, so our goal will be to get to them
- You'll find Alonso at the entrance to the control room, you'll need to get inside the elevator, but first you'll need to cause some kind of distraction
- Use the nearby Spankles machine, but use the hacker to make the alarm go off, Alonso will approach to investigate, when he does the nearby hoload will change
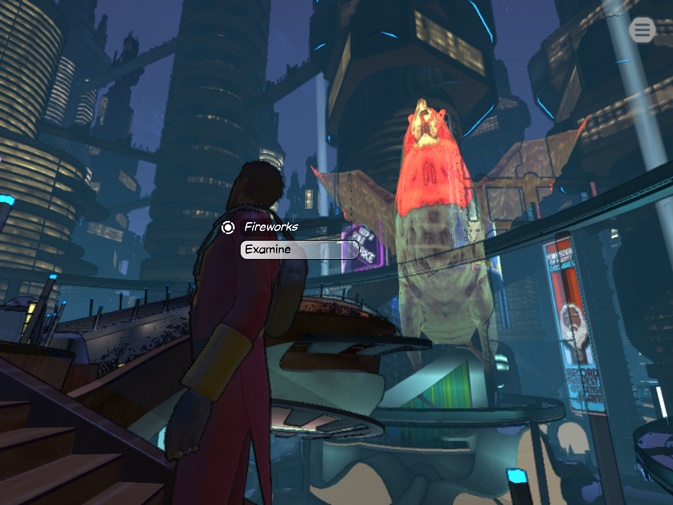
- A vermin warning only shows when Alonso is nearby, while he's there put the vermin warning node in the main display of the hoload with the hacker
- Now use the hacker to slowly move the vermin warning from hoload to hoload, leading down the stairs and towards the projector - make the projector display the vermin warning to light up a giant Gang-Gang bird
- This is the distraction you need to use the elevator in the control room, go get up there
4
Finding the shadows

- Inside the control room use your crowbar on the vent in the corner of the room, and then crawl through
- Ascend the spiral ramp and follow the people you see
- You will be given the option of watching the performances of Reginald and Tarquin - we used the Aspiration Gala poem to give to Tarquin, but you can also use the private poem, and the outcomes are slightly different
- Follow the path and descend a ladder to find the path forward
- After some happy reunions things go awry pretty badly, and you'll need Joey to continue
5
Taking out the android and getting Foster back

- You'll need to take the android out, first you'll need to use the console in the centre of the room
- Deactivate the power to one of the empty chairs, this will prompt the android to press a button on the console to fix it
- Make sure it can't be fixed by flying behind the chair you chose and deactivating it by bashing into it
- The android will attempt to fix it by climbing over the rail, at which point you can have Joey push him off
- Return to Orana to continue
- Once you regain control of Foster, follow Joey into room five
- Once everything is done, follow the path you used to get here, and you'll eventually make your way back to the recycling plant - we're finally approaching the end of the game…
