The ultimate Monster Hunter 4 Ultimate Palico guide
Miaow you know

Monster Hunter 4 Ultimate's been out a couple of months now, but one common question I keep hearing from players is 'What's the deal with these here cats?'
Well, they're called Palicoes (formerly Felynes), and they live to serve you in battle... and throw plenty of terrible puns your way to boot.
It can be hard to get your head around how to make the most of your Palico chums as it's so easy to get lost in all the different types and combinations available.
Not to worry though, I'm here to guide you through it.
Before getting too bogged down with what's about to come, I recommend you make your way to Cheeko Sands in the Caravan (single player) storyline first.
As soon as you complete the "Wild Palico Panic" and "Meownster Hunter Havoc" 4-star quests, Sunsnug Isle will open up.

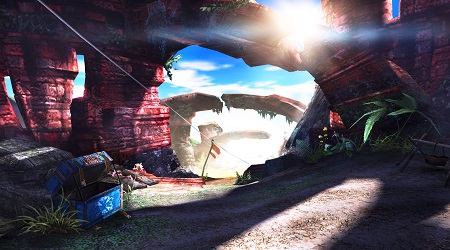
Sunsnug Isle
You can only have 20 Palicoes when you first arrive on the island, which is a little lacking if you'd like to have a good mix of Palicoes.
To get more, here are the prerequisites for each upgrade:
30 Palicoes:
Finish the 5-star "Zinogre Zone" Caravan Quest, then source 4x Jumbo Bones and 5x Slagtoth Hides to complete the "Sunsnug Annex" Villager Request in the Wyporium.
40 Palicoes:
Finish the 6-star "Advanced: Afraid of the Dark" Caravan Quest, then source 5x Remobra Hides and 5x Monster Bone+ to complete the "Sunsnug Annex, Part Two" Villager Request in the Wyporium.
50 Palicoes:
Finish the 7-star "Skiff Scuttler" Caravan Quest, then source 3x Small Hermitaur Shells and 2x Stoutbones to complete the "50 Palicoes" Villager Request in the Wyporium.

Palico Farmer
These crazy cats can be recruited from the semi-secret Palico areas on each map. These tend to be the smallest areas on the map (usually #10), with vaguely hidden cubbyhole entrances.
Inside each den, there'll be one cat that stands out. Talk to it and you'll have the chance to hire it after completing your current quest.
If you're looking to indiscriminately nab as many Palicoes as you can as soon as possible, choose a Harvest Tour quest on Sunken Hollow or Volcanic Hollow, drop off the ledge at the start, veer off to the right and into area 10 and talk to the Palico in front of you.
Soon after you should receive a notification that supplies have arrived. Climb back up top, collect your Paw Pass Ticket from the Supply Box, then drop it in the Deliveries Box. All in all the entire process should take no longer than 2-3 minutes.
 Choose Wisely
When recruiting a Palico, You'll only have a few minutes to decide whether you want to keep the little blighter or send it off back into the wilderness. With four pages of stats and abilities, it's hard to know what to focus on, so let's break it all down:
NameYou'll be able to change this as soon as you hire the Palico in question. Take note that you can only name Palicoes you hire once - there is no way to rename them later.
Health, Attack, DefenseCompletely down to the level and Forte of your Palico - you can ignore this.
EnthusiasmIrrelevant when hiring Palicoes. Enthusiasm is best raised by sitting at the Street Cook's bench and eating a meal before each quest.

Forte
There are nine different types of Palicoes. They're self-descriptive, so I shan't go into inane detail for each. Suffice to say after investing over a hundred hours of experimenting with each type, I've narrowed my preferred types down to two:
Healing is best type to stick with if you regularly find yourself low on HP or getting poisoned, while Stealing Palicoes are useful for netting some extra materials when fighting monsters once you have the confidence and / or defence to get by without assistance.
That said, you may have a very different playstyle to me.
If you're big on mounting, the Launching Palicoes will reduce the cooldown time that affects your ability to mount each monster. Treasure Palicoes are preferable for gathering quests, but putting a team together specifically for that seems like overkill.
Each different type of Palico prefers a certain map or two. Here are the best maps to find each type:
- Fighting - Ancestral Steppe, Volcanic Hollow
- Protection - Sunken Hollow, Dunes
- Support - Frozen Seaway, Unknown Forest
- Healing - Sunken Hollow
- Bombing - Volcanic Hollow, Heaven's Mount, Unknown Forest
- Stealing - Heaven's Mount, Volcanic Hollow, Unknown Forest
- Treasure - Ancestral Steppe, Primal Forest, Heaven's Mount, Unknown Forest
- Stamina - Primal Forest, Dunes (after reaching Caravan High Rank)
- Launching - Sunken Hollow, Dunes (after reaching Caravan High Rank)
Team Attack
There are three types of forte, although each one will have different permutations once you reach the High Rank quests. In short: don't get too attached to your Palicoes until you reach 7-star Caravan quests. Purrtuoso increases your max Health and Stamina at the start of each quest, and can also offer health regeneration and elemental defence buffs if your Palico has the corresponding combat skills. Stacks best with Healing Palicoes.
Flying Bomb has your cats jump up onto monsters and scratch their eyes, working like an extended Flash Bomb that also inflicts damage. Can also make monsters fall over if the Palico in question has the Team Attack Boost skill. Best all-round skill I reckon.
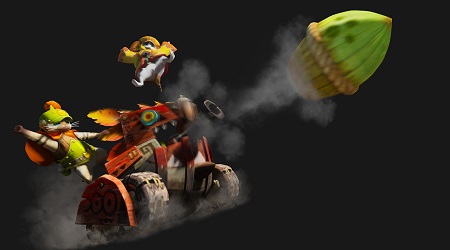
Rath of Meow pops your cats in a tank, firing 4-6 rounds at the monster you're hunting. Shots can be strengthened and elemental damage can be added with the right mix of Team Attack combat skills. Works nicely with Fighting Palicoes if that's your cuppa.
TargetThis has no bearing when you're in the hiring process. Your Palico will focus on attacking smaller or larger monsters depending on which weapon it's equipped with.
CoatPurely visual. Denotes the fur pattern that appears on your Palico. While you can't change this, you can change the colour of your Palicoes at any time.
 Combat Skills
These are the skills your Palicoes will use when they join you in battle. Each combat skill carries an invisible weight, costing between one and three points.
Each Palico can carry a maximum of three of these skills, adding up to a maximum of six points. I recommend as many of these as you can get together:
- Team Attack Boost (3pt) - Gives your Team Attack an extra effect.
- Speedy Recovery (3pt) - Increases natural recovery speed.
- Frenzy Punisher (3pt) - Increases damage against frenzied monsters.
- Big Block Boost (3pt) - Greatly increases block chance.
- Team Signal (2pt) - Allows you to perform a Team Attack every six minutes.
- Nine Lives Attack (2pt) - Increases Attack by 10 after every revive, stacking up to 8 times.
- Nine Lives Defense (2pt) - Increases Defense by 10 after every revive, stacking up to 8 times.
- Block Boost (1pt) - Increases block chance.
- Negate Poison (1pt) - Grants immunity to poison.
If you somehow get a combo of any of the above that adds up to six, you're minted. Just make sure you avoid the Last Stand skill at all costs, as your Palico will not revive after it gets knocked out in battle. Gathering Ban should be avoided too, especially in the case of Treasure and Stealing Palicoes.
 Meownster Hunter Skills
This is an important minigame for Palico fans, as it's where you'll find most of the materials you need to make nifty weapons and armour for your cats.
Don't bother with any of the "Strike" or "Barrage" attacks; ideally you want "Onslaught" attacks. I'm not keen on Wild Card or Experience Boost, but they don't hurt. These are my top picks though:
- Melee Onslaught - As a Meownster Hunter, enables ultimate melee attacks.
- Ranged Onslaught - As a Meownster Hunter, enables ultimate ranged attacks.
- Bomb Onslaught - As a Meownster Hunter, enables ultimate bomb attacks.
- Skill Technician - As a Meownster Hunter, makes Palico Skills trigger more often.
- Treasure Hunter - Sometimes increases rewards earned.
- Reward Reaper - Ditto. I get the feeling this one may be more potent than the above though.
- Unreal Blocking - Sometimes nullifies damage taken in Meownster Hunter.
 Casting Machine Skills
If your Palico already has the Team Attack and Combat Skills you're after, don't worry too much about these. They'll help with the Casting Machine minigame on Sunsnug Isle.
The "Catcher" skills aren't worth writing home about, but these three certainly are if you want to increase your chances of finding rare materials:
- Meowster Fishermyan - Sometimes increases rewards earned from the Casting Machine.
- Fearsome Fisher - When using the Casting Machine, schools of fish are slower and easier to catch.
- Handsome Haul - Increases net size to make it easier to catch multiple schools of fish together.
When on a Caravan Quest (in single player mode), two Palicoes will assist you in battle - your Main Palico, and a Sub Palico. If you hunt with one other player online you'll be able to take your Main Palico into battle with you, but if you play with any more than one other player, there'll be no Palico joy in store for you.
How you set up your Sub Palico and other First Stringers decides how your Main Palico will perform in battle. You can set this up via the Palico Board inside your house, or at Sunsnug Isle.
Have a peep at the "Set 1st Stringers" option in the Palico Board menu. Hopefully you'll have at least five Palicoes at this point. Set as many as you can to be First Stringers, ideally with a few sharing the same Forte.
Now go back and select the "Deploy / Train" option from the menu. Choose to "Deploy" one of your First Stringers along with your Main Palico. Now tap the R shoulder button.

You should see that your Main Palico's Team Attack is the same as your Sub's, and that its Forte rolls with the majority of your First Stringers (if you have three or more with the same ability).
Your Main Palico's battle skills are determined by the number of First Stringers with the same Forte. I tend to roll with four or five Healing Palicoes for the True Health Horn skill, giving me huge health boosts whenever I lose health.
However, you may prefer to stick with just three Healing Palicoes, swapping in two Fighting, Protection, or Support Palicoes for an Attack boost, Defense boost, or free Shock Traps accordingly.
There are an inordinate amount of combinations, but my rule of thumb is to go by what you need for your playstyle. I carry enough demondrugs and armorskins that I rarely need to worry about attack or defence boosts, but your mileage may vary.
 DLC Warning
Yes, much of the crossover downloadable content has already arrived in Monster Hunter 4 Ultimate, and I know you're tempted to redeem your Mario and Sonic outfits right away, but hold your horses!
The materials you're provided with can also be used to make really powerful, G-Rank weapons and armour for your Palico. Trust me, it's worth waiting for if you plan to play 4U for hundreds of hours and are particularly keen on a DLC outfit or two.
Level UpOnce you're happy with your perfect team of Palicoes, go out and grab experience! Throw them into every battle and minigame they can muster, and make sure you go Meownster Hunting for weapon and armour scraps after every three battles you fight.
.jpg) Courier StreetPass
Courier StreetPass
Proud of your Palico? Be a good old bean and share over StreetPass!
Track down the Courier Palico who's skulking around each and every town in Monster Hunter 4 Ultimate. Talk to it, selecting StreetPass, then Palicoes. Pick the best one you have to hand, and choose to send it out.
Learn from our mistakes!If you're after more tips or just want to see four loons running away from monsters each week, be sure to tune in to our weekly Monster Hunter 4 Ultimate stream on our Twitch channel.
We'll be live with the show every Friday at 5pm BST, 9am PDT, and 12 noon EDT.
Have any more tips? Let us know in the comments below!